Ivy - Homepage Setup

Configure Reading Settings
For the homepage to display like the demo, make sure that your reading settings are configured correctly:
- Go to WordPress > Settings > Reading.
- Under Your Homepage Displays, select "a static page."
- For the Homepage, select the Home page. (If you don't have a Home page, go to WordPress > Pages > Add New and create a blank page titled Home)
- For the Posts page, select the Blog page. (If you don't have a Blog page, go to WordPress > Pages > Add New and create a blank page titled Blog)
- Save changes.
Overview
The Ivy homepage has seven total widget areas:
- Home - Slider
- Front Page 1
- Front Page 2
- Front Page 3
- Front Page 4
- Front Page 5
- Front Page 6

Below we'll go over what is inside each of these widget areas. If you imported your widgets, all of the homepage widgets will already be set up for you, so all you'll need to do is fill in your own details!
How to place widgets
In your WordPress dashboard, go to Appearance > Widgets. You can drag widgets from the left side of the page into any of the widget areas on the right side of the page.
Home - Slider
This widget area houses the carousel slider in the demo. Click here for setup instructions.
Front Page 1

Custom HTML widget in Front Page 1:

Front Page 2


Image in demo is 430 x 533


The <br />'s here create line breaks to move the text down in relation to the image. If you want to use more text, remove one or both of the <br />'s. If you want to use less text, you may want to add additional <br />'s so everything is nicely lined up.
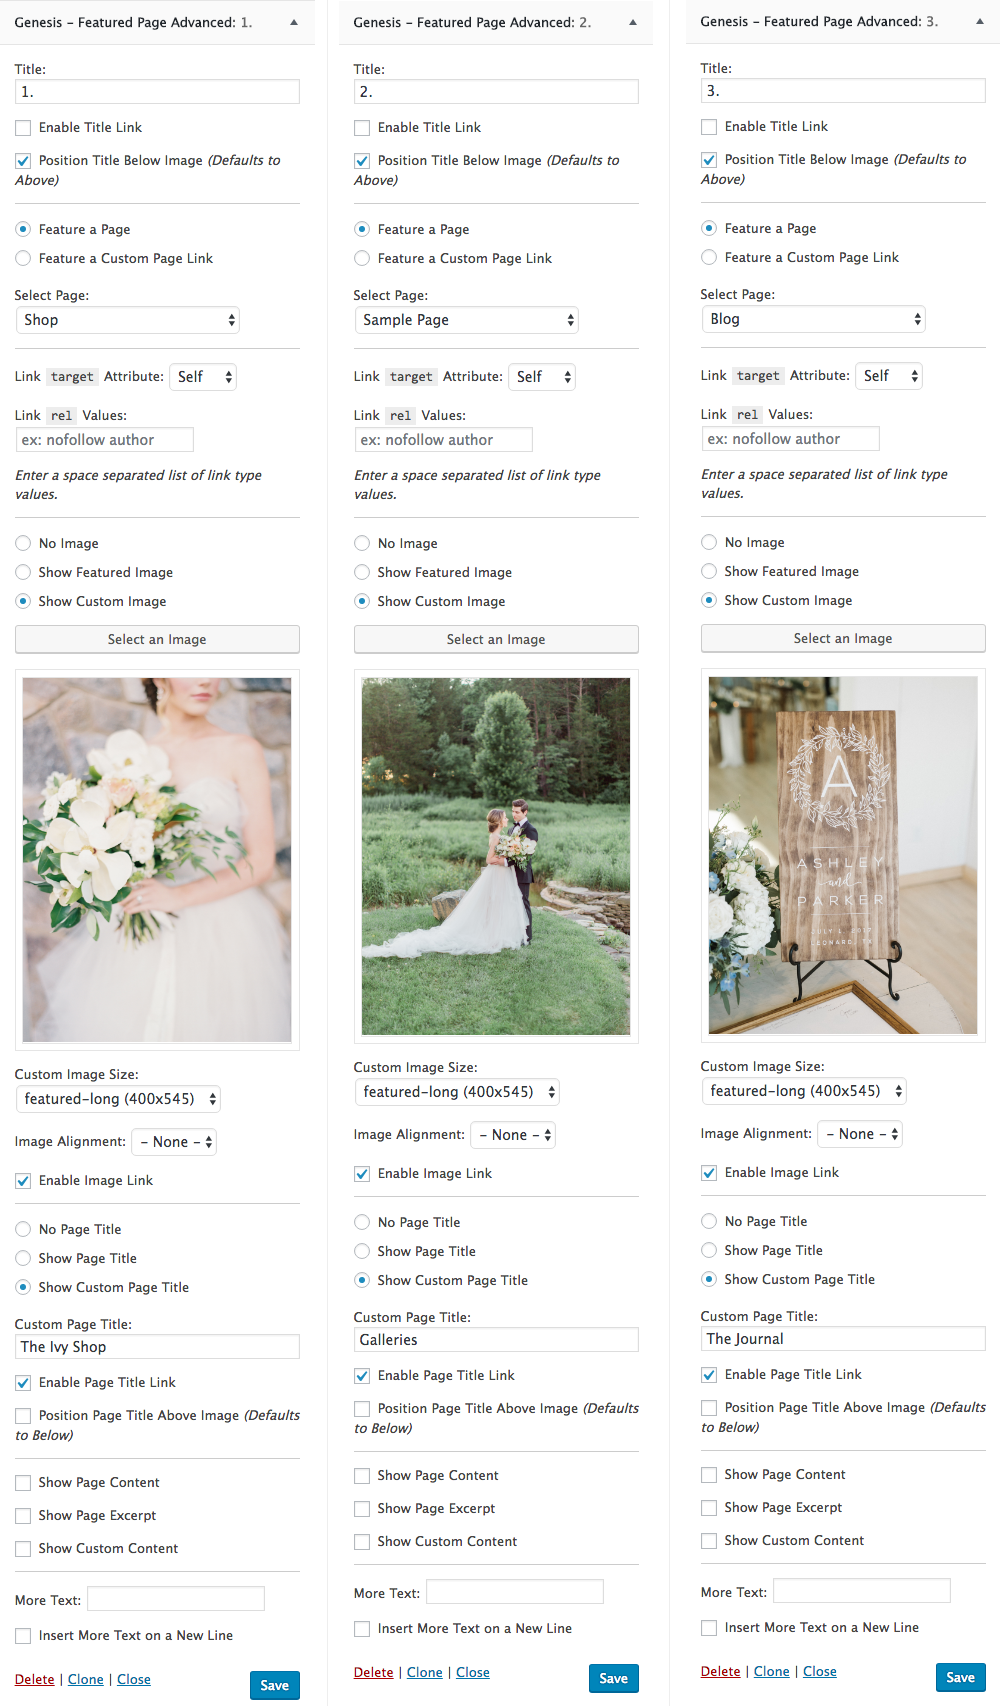
Front Page 3


(Click the image below to make larger)
Front Page 4


Click here for instructions on configuring Genesis eNews with Mailchimp.
Front Page 5


"Our Services" title:

First Column:

Second Column:

Third Column:

The icons used in Front Page 5 can be changed. Here's how:
- Go to ionicons.com. Search or browse for the icon you want to use.
- Click on the icon and the class name will appear for that icon (e.g. "ion-lightbulb"). Copy the class name.
- In the screenshot above, find <i></i> Replace "ion-university" with your new class name. Be sure to keep the first "icon" class name where it is. Use the same instructions for changing any of the other icons.
Example: <i></i> would become <i></i>
Front Page 6


In the Ivy demo, "the blog" portion of the widget title is in a pretty script font. Whatever part of the title you want to be script, wrap it in <em> and </em> as shown below.


